|
BACK IN THE SADDLE (STITCH) AGAIN!
|
 |
Back in the 1970s and 80s, I was very active in the small press fanzine scene. Since 1979, I have self-published more than 50 different small-press fanzines (and I would often print 100+ copies of a single title). Almost all of these were saddle-stitched "digests" (an 8.5 x 11 folded in half and stapled on the spine to produce a book that is 5.5 x 8.5 inches). This adds up to more than 1,000 copies of various comics, books, and magazines and I never bought an extended-reach stapler! Nowadays, of course, I usually use this technique to produce prototypes of game books, or to make small props for my games. |
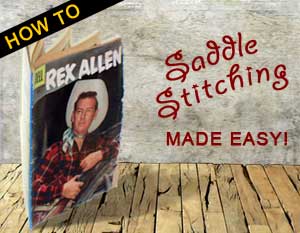
There's no reason you can't just staple your papers in the upper left-hand corner, but if you'd like to add a little jazz to your project -- without buying any special tools -- there is a very simple way to staple a book on the spine with a normal stapler, and I'm going to tell you how to do it. This technique is called saddle-stitching, and it has been used to bind most of the magazines and comic books that have been released in the past 75 years (as you can see from this photo of an old 1956 Rex Allen comic book). This technique is very simple: wide sheets of paper are combined to create a magazine, they are folded and stapled along the spine. This creates a simple magazine that is cheap to produce and has the advantage of lying flat on the table.
The origins of the term are not completely clear, but most people agree that it earned that name because, if you hold the magazine by its spine, its sides will bow out into a shape similar to that of a saddle, or more specifically, like the legs of a cowpoke drapped over his saddle.
Now, before we start this here workshop, I want to say up front that I know danged-good-and-well that this is more labor intensive than buying an extended-reach stapler. But dagnabit, I'm cheap and those things run from $20-$30. And, if you only need to make a few copies of a book (printed on your home printer, no doubt), you can do this with things you already have lying around your house.
You will need:

NOTE: No, these will not get those cool curved staples that you get with an extended-reach stapler, but trust me, these will hold fine. Just be careful not to poke your fingers with the sharp prongs of the staples while doing this. Unless you're doing a horror book, you probably don't want splatters of blood on the pages.
There ya go! Saddle-stitching at home with no special equipment. As I said, this isn't the fastest way to do it, but it is the cheapest, and I've done it for years.
--------------------------------
All text and illustrations copyright 2004, 2008 by Mike Mitchell