|
| ||||||||||||||||||||||||||
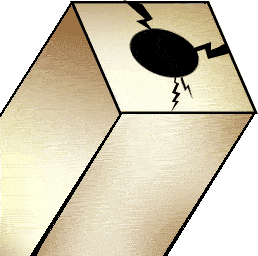
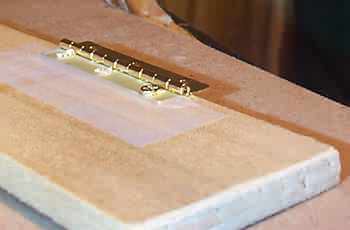
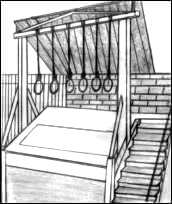 MASS PRODUCTION Maybe the history books should look forget about Henry Ford and look at Judge Parker as the inventor of the Assembly Line. As shown in this archival sketch, this hangin' judge had six nooses with no waiting! |
This image also addressed my next design consideration: size. Or, more specifically, how many miniatures did I want to hang at once? I decided that I wanted a large gallows that could handle all three of the doomed outlaws at once, and that I would probably expand it to include a fourth criminal (you know, for future games – some baddies are bound to get captured again). At this point I decided that a large, single trap door was the way to go. It might not be completely historical, I thought, but it would work. Turns out it actually was based in history: Federal J udge Parker at Fort Smith Arkansas had a large, single door gallows comparable of hanging up to six men at a time. Leave it to a Southern judge to make a six-man gallows. I drew up a quick, rough sketch of what I was thinking of, and then set off to work. Truthfully, I found myself referring more to the photo above than to my own sketch (see below). |
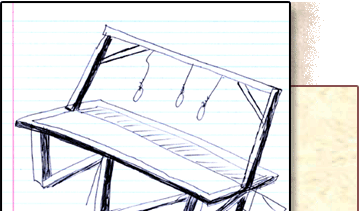 |
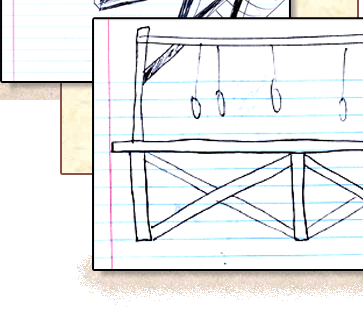
ROUGH SKETCHES As the project progressed, these sketches on notebook paper turned out to be just vague guides. I would up using a printout of the above photo more than I did these drawings. Thiswas particularly true when it came to placing the ramp/stairs. Also, note how I dumped the "X" pattern for something simpler in the end. |
 |
 |
Step 2: Building Materials & Supplies
I knew right from the start that I wanted to work with wood. This decision
was guided by my need for durability (not from rough handling, but from
travel, mostly) and because wood looks cool. Durability meant no balsa
– it’s just too fragile. So I looked through my woodpile and
found that I had a supply of 3/8th inch square dowels on hand from previous
projects, along with assorted wooden planks. I originally wanted to use
1/4 inch dowels, but my screws were too thick. This, it turns out, would
be a problem that would plague me through the entire project.
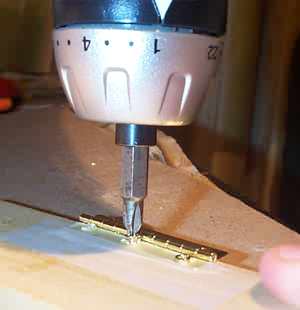
 SCREWING AROUND #4 x 1" is the main screw I used while building my gallows. The #4 refers to the diameter. Low numbers are smaller, thus a #2 is very thin, a #4 and #6 seem to be the standard width for kitchen cabinets. The second number is how long it is in inches. |
I made a trip to a nearby Sears Hardware Store and bought an assortment of the smallest self-tapping wood screws, mostly #4 x 1” but a several other sizes, as well, including a lot of #4 x 3/8” screws. I also picked up some more wood dowels. I looked at the hinges but didn’t see anything I liked. They were all huge, obviously designed for hanging kitchen cabinet doors. Another day and another trip to Home Depot didn’t yield any better options, although I did note that on the screw gage at Home Depot it actually went down to a #2 screw, which looked a lot thinner than the #4 screws I had. It was here that I also figured out what the numbers meant (see caption under photo). I mentioned my hunt for small hinges to my wife about and she suggested that I check the dollhouse aisle at Hobby Lobby. A quick drive and I was rewarded with several hinges that would work perfectly, and they even came with their own screws (probably #1 or #2 wood screws).
|
Step 3: The trap door frame |
|
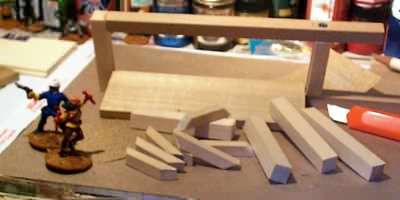
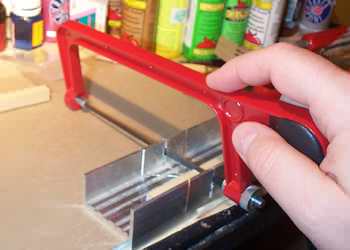 A CUT ABOVE I used an Xacto miter box to make sure the posts for the hangman's gallow's were cut straight. |
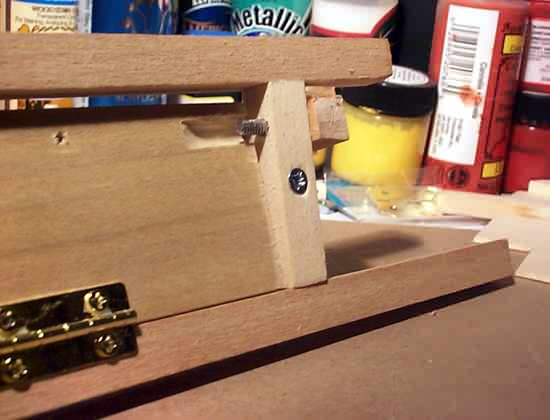
I started with a simple frame made of the 3/8” dowels. I trimmed them using a small hacksaw and an Xacto miter box to ensure that the edges were fairly straight. Even with the miter box I still couldn’t quite master the square edges, so I used my Dremel to smooth the edges flat . I mainly used a flat cutting wheel as a makeshift planer. Once I had the pieces cut to this pattern. I intentionally left the right end open for the executioner’s platform Later I would have to change this to improve the stability of the structure and to add the door opening mechanism. |
 SPLITTING HAIRS Or at least splitting wood. The screws turned out to be too big for thewood I was using, and I couldn't find any smaller screws at the hardware store. |
This is where I encountered my first real problem with the wood screws. They were so big that when I tried driving them directly into the end of the wood, it split. This was a major problem when I screwed into the ends of the wood. Needless to say, this was VERY annoying. I had to re-cut two pieces of wood and start over. I considered living with it and trying to make it work by using wood putty or something like that, but finally decided that it wouldn’t be strong enough to stand up to the riguors of travel if I started using split wood. So, I bit the bullet…. or perhaps I should say I bit the bit. |
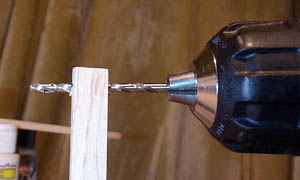 A HOLE IN ONE In order to keep from splitting the wood, I had to pre-drill the holes. I used s bit that was slightly smaller than the screws - this would allow the screw to grip the walls of the hole and actually hold the wood together. |
I got out my drill and carefully drilled out each hole prior to putting a wood screw into it. This was, by far, the most time-consuming aspect of construction. Every single hole had to be carefully pre-drilled to avoid splitting the wood on the gallows. But, I reckoned, that’s just one of the obstacles you have to face when you’re working in 25mm terrain. Of course, there were more ovstacles to come. |
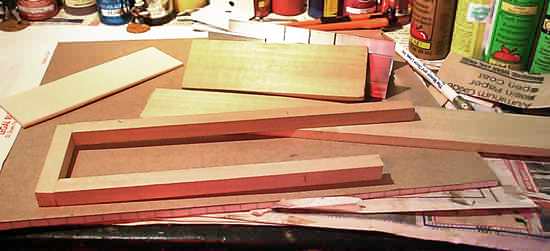
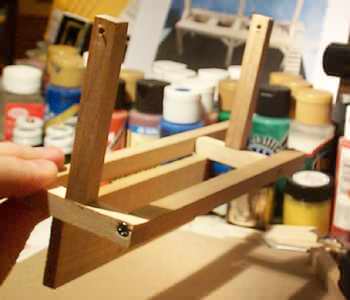
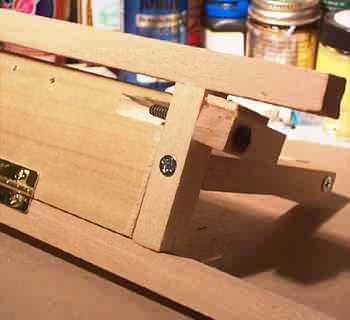
THE BIG FRAME UP
Wood screws are holding together the trap door on a messey workbench.
Now all we need is a support frame and a trapdoor.
Step 4: The trap door
This is one of those places where I measured a few times and kept second-guessing
myself. I knew I wanted the single trap door to be roomy, but when I made
it 8 inches long it was huge. Even Six inches looked too danged big. I
finally settled on slightly under 5 inches. The measurement was based
on how comfortably the door would accommodate four miniatures with standard
1-inch basing.
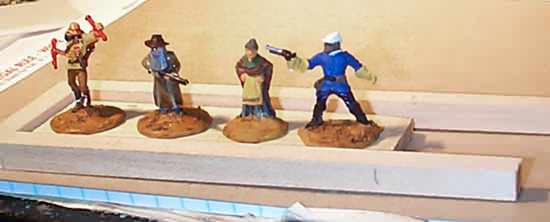
SIZING UP THE DOOR TO HELL
I just grabbed four miniatures off my workbench to see how easily they
would fit on the trap door. It turns out about 5-inches was the magic
number. I tend to base rather thick, too, which helps make the gallows
look a little closer to 1:60 scale. The mniiatures in this photo are a
mix of 25mm and 28mm figures.
Now that I finally knew how big I wanted it, I needed to figure out what kind of hinge to use on the door. Several people suggested that I use fabric or leather and superglue it to the bottom. This would work, but I wanted something sturdier and that would last longer (Super Glue will dry out and crack over time). After much discussion about what to use as a hinge, I decided to use the small hinge I had bought in the doll house aisle at Hobby Lobby.
Using a hinge actually helped me solve one of the problems I had long been concerned about: whether the trap door would actually be heavy enough to swing down when released.
Now, when miniatures were on it, they would have enough weight to move the door. But I still wanted it to drop even without weight on it (it’s more dramatic and fun that way). I even considered adding lead weights to the bottom of the door. Fortunately, by using a hinge and wood screws, I realized that I would need to use a thicker piece of wood (otherwise the screws would poke through). I chose a nice 1/8 inch piece of hardwood for the trapdoor. Not only was this thick enough to keep the screws from going through, but it provided enough weight so that it would actually fall down when released by my still-undesigned door release mechanism. I had bought this slat in the shelving department at Home Depot a year or two ago for some other project. I had been thinking about using this piece all along, which is why I had built the frame large enough to accommodate it. Although I had been considering using this piece of wood, this was the point where I decided that I would definitely be using it.
I had a few hinges to choose from, but since I wanted this to swing freely, I decided to use a large single hinge. I was worried that if I used a pair of hinges, one at either end, I might not hang them perfectly even and that would cause the door to stick while swinging down. The single hinge solution was simple and elegant, particularly since it didn’t have to support a lot of weight. To keep the hinge in place while drilling the holes in the wood, I used a simple piece of Scotch Tape to hold it down. This was important because, as with the other woods, I had to pre-drill the holes first. If I recall correctly, I drilled one of the outer screws first, then inserted the wood screw, taped down the hinge, and drilled the second two holes. |
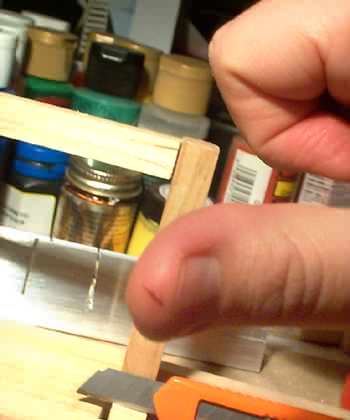
 THE SOFTER SIDE OF HANGIN' I used my Dremel and a little sandpaper to soften the edges slightly. My main motivation for this was to lessen the chance of getting any splinters while handling the trapdoor. |
 |
This step was very important because, if it shifted before I could screw it down, the door would hang and the gallows wouldn’t work. I then used my electric screwdriver (one of mankind’s greatest inventions) to insert the final two screws on the door. I have a multi-speed Black & Decker electric screwdriver with variable torque settings. Although I was using a moderately hard wood, I still chose to keep the torque low so I wouldn’t risk stripping the heads on the tiny screws that came with the hinge. I was extra careful here because these were made of soft brass. |
 |
I then repeated the process with to attach the door to the frame, but I first completed it by adding a short brace across the opening I had originally left for the platform. I did this to improve the stability of the underlying structure of the gallows. |
Step 5: The upper frame and trap door mechanism
Still pre-drilling the holes, I quickly added two top posts that would
provide the support for the top bar that would support the nooses. I’m
not actually sure why I did it in this order. It just seemed like a good
idea at the time. I do recall that I struggled with the length of the
posts.
 |
I finally settled on 3-inch posts because they looked good, even though they are really too big to be in scale. It was becomming readily apparent that this entire rig would wind up being too big, but for me, functionality was more important than being a slave to scale. As long as it looked okay to me, then I was going to be happy with it. |
 |

 Ouch!
Ouch!


Ian K. looks over the carnage during the game.
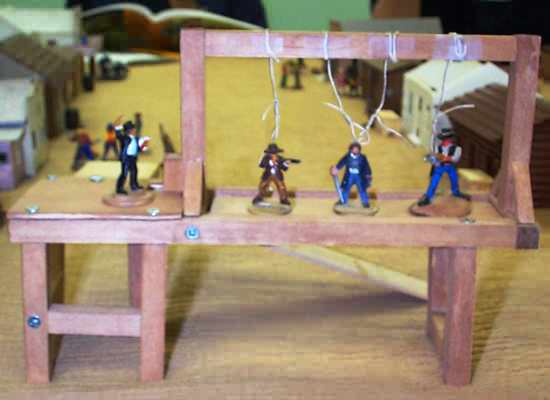
 HANG 'EM HIGH!
Stretch their necks, boys!
Mike Mitchell
Aug. 19, 2005
![]()
![]()